We are so glad you’ve chosen Registrations for the Events Calendar to manage event registration on your WordPress site! Use these steps to get started within just a few minutes.
1. Install and activate Registrations for the Events Calendar.
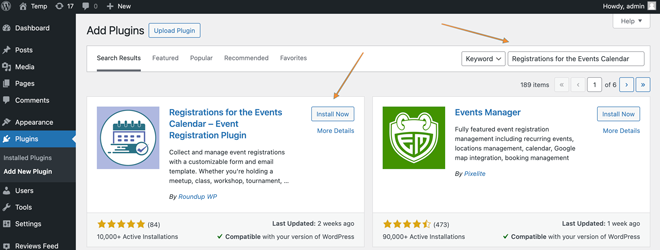
- From the WordPress dashboard, visit the Plugins page. Click “Add New.”
- Use the search bar to search for “Registrations for the Events Calendar.”
- Follow the suggested steps to install and activate the plugin
- Visit the new “Registrations” menu item to get started.
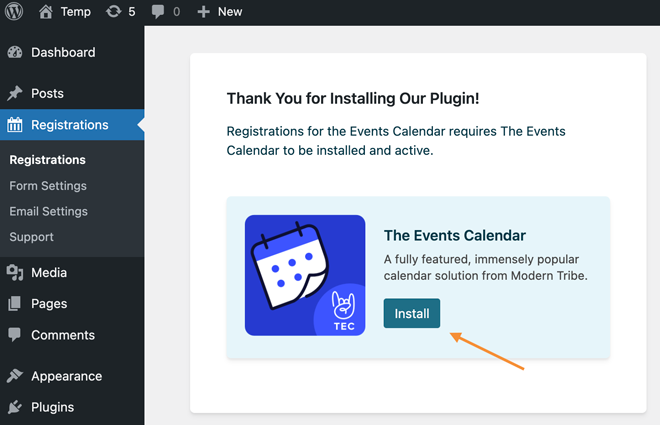
2. Install and activate The Events Calendar by Modern Tribe. Visit your new “Registrations” menu item. If The Events Calendar is not yet active, you can do so from this page:
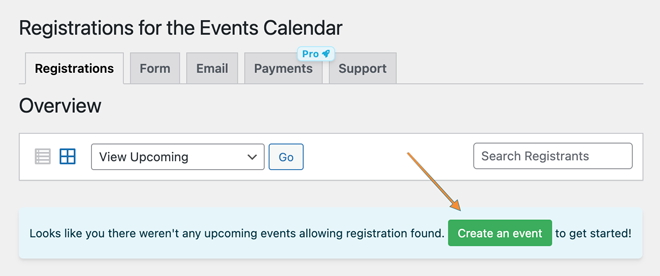
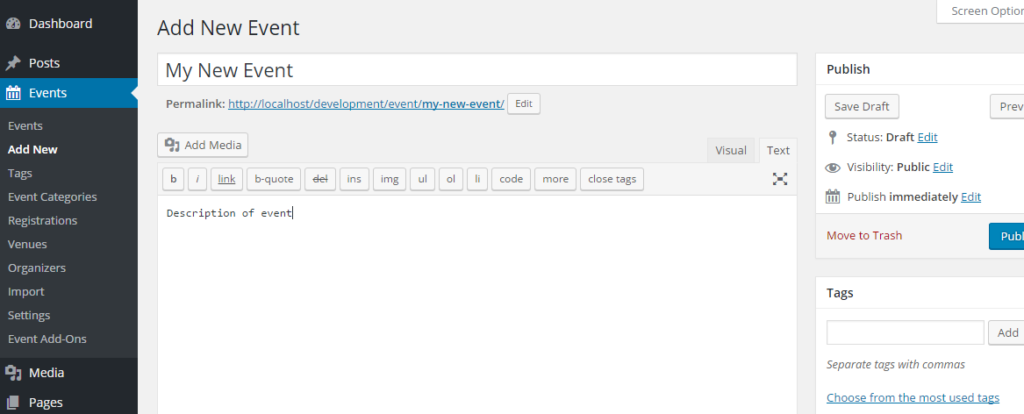
3. Create a new event by going to the WordPress dashboard and navigating to Events -> Add New. If no upcoming events exist, you will be prompted to create an event while on the “Registrations” page.
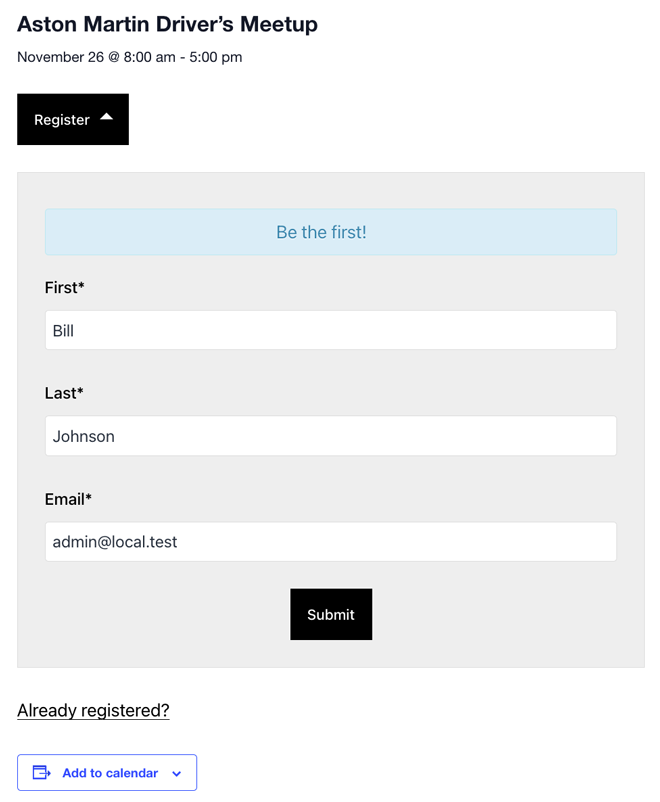
4.View your new event on the front-end of your site. A registration form will appear by default.
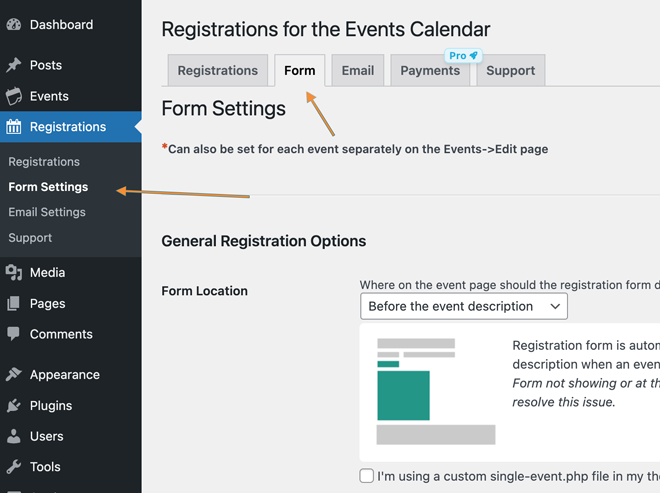
If you’d like to disable registrations for all of your existing events and manually enable them instead, enable the option to do so in the WordPress Dashboard, navigate to Events -> Registrations and then select the Form tab.

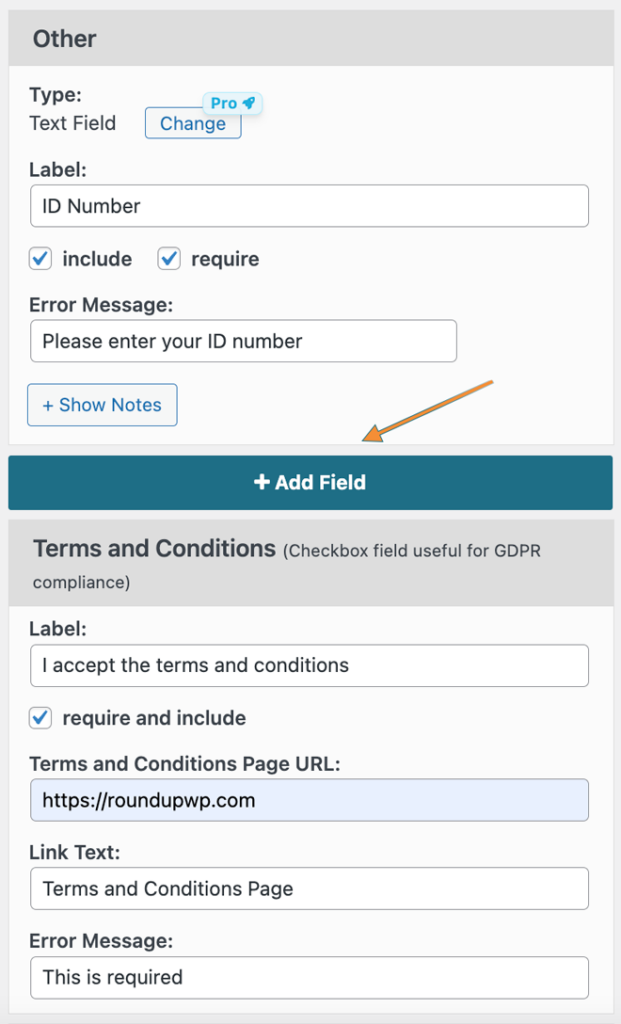
5. To configure form fields, registration limits (can be set for each event), messaging on the form, and more you would need to go to the WordPress dashboard, navigate to Form Settings page or select the Form tab from the Registrations page.
You can also add, remove, or edit form fields on this page.
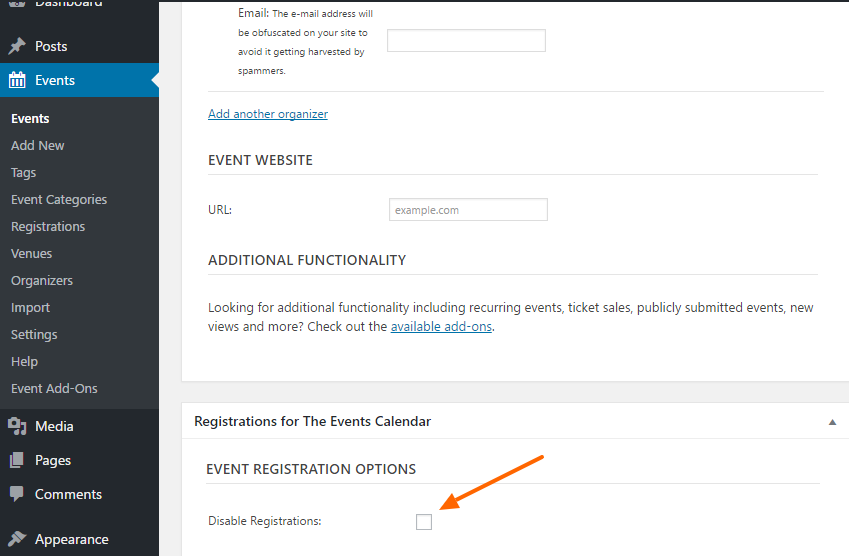
6. You can enable/disable registrations for each specific event by checking the box on the “Edit Event” page for the specific event, or by toggling the “Event Options” on the “Registrations” tab.
Edit Event Page
7. On the “Email” tab, you can edit the subject, from address, messaging and more for the confirmation emails sent to registrants and notification emails sent to the addresses of your choosing.
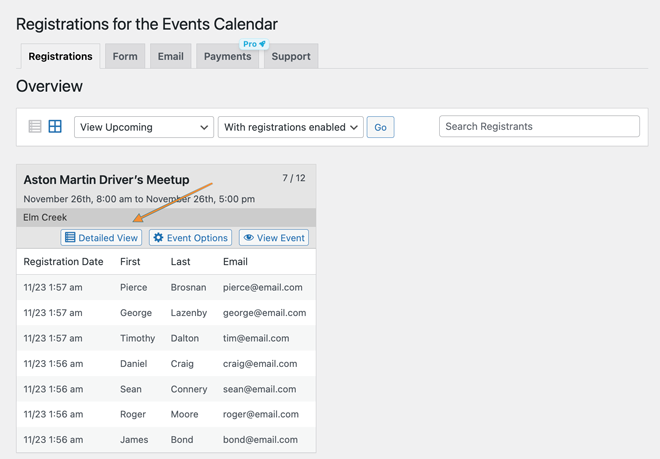
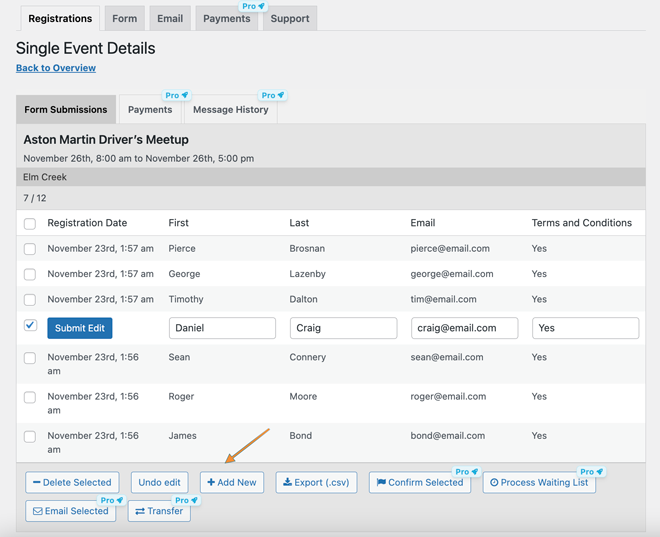
8. Once you’ve began collecting registrations, use our handy dashboard tools to manage them. To view all submitted data from registrants, download a .csv file for an event, and to add, edit, or remove registrations manually, navigate to the “Registrations” tab and click the “Detailed View” button for an event.
You’re all set! You can continue to add more events and tweak registration settings as needed.
We suggest setting up an SMTP service for best results with email sending. Read more about that here.
Need more help? Visit the forum on WordPress.org and open a new thread.