1) Install and activate The Events Calendar by Modern Tribe as well as Registrations for the Events Calendar Pro. Visit this page if you haven’t done this yet.
2) Once you’ve purchased the Mailchimp for Registrations for TEC add-on you’ll be presented with the purchase confirmation screen which displays your license key and a link to download the plugin. This information is also emailed to you at the address which you provided during checkout. Copy the license key, you can use this to download and activate the plugin from the admin area of your WordPress site.
Note: You can also download the plugin zip file directly from your Account on our website.

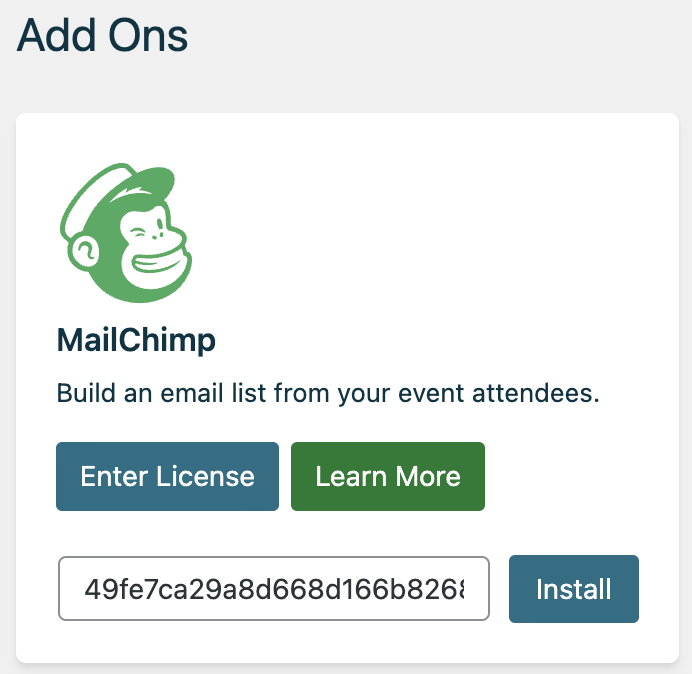
3) Activate the MailChimp Add-on
From your WordPress dashboard, visit the Registrations settings page. Then find the License and Add ons tab and visit the page. Here you can enter the license key copied from step 2 to activate the license as well as download and activate the add-on.
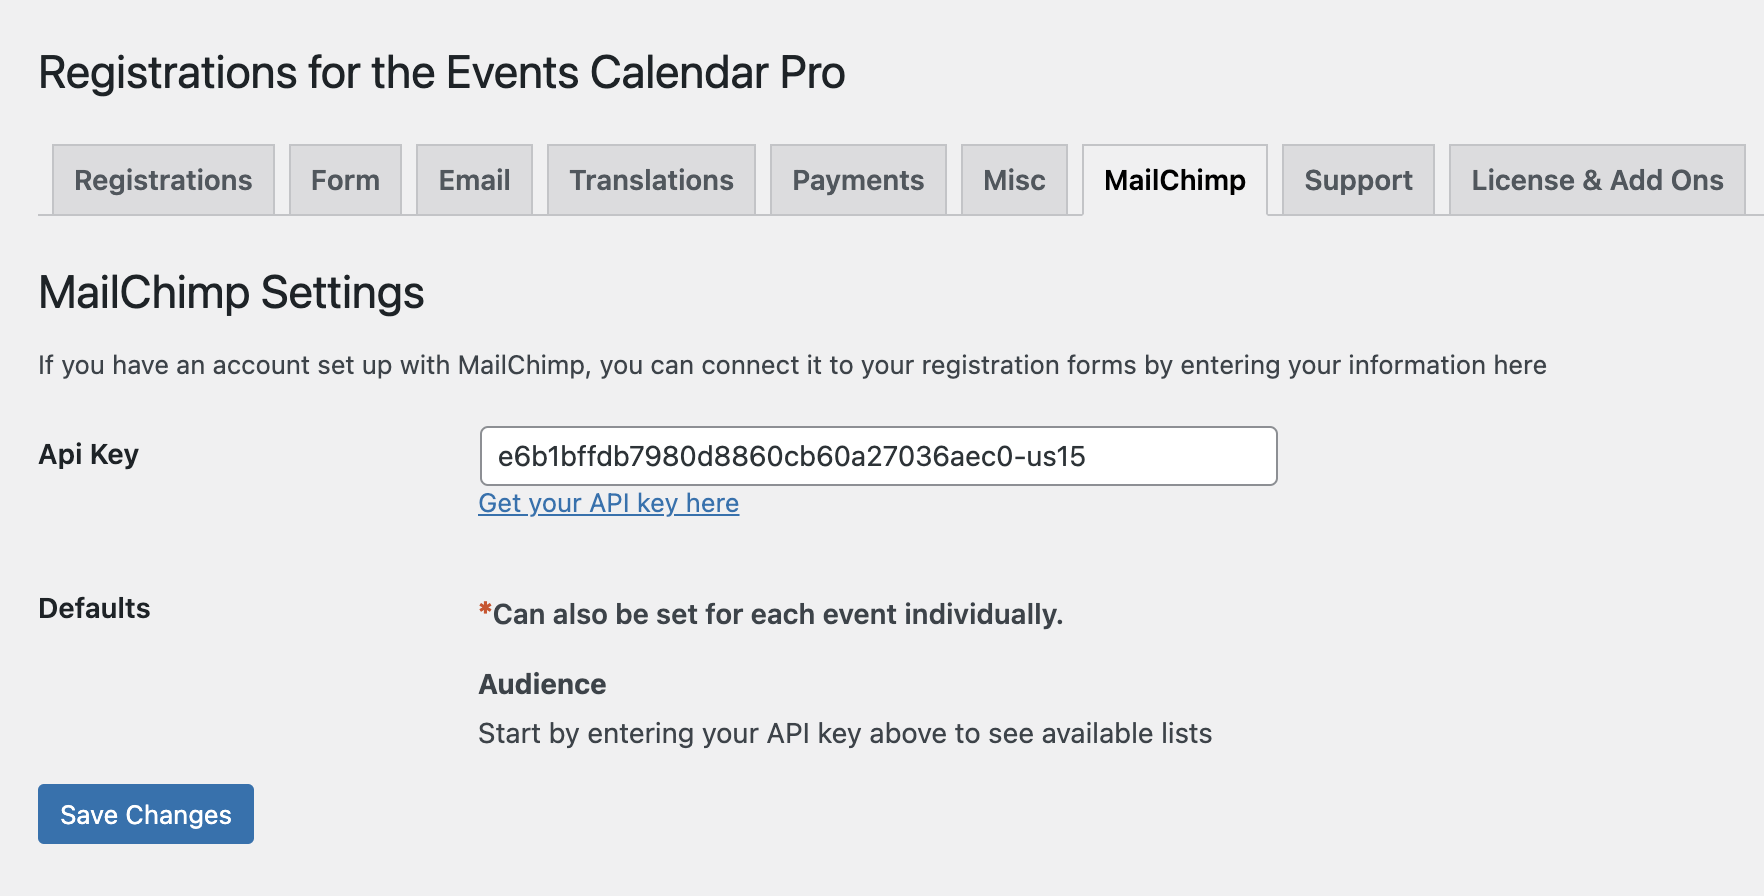
4) Refresh the page, visit the MailChimp settings tab
On this page you can enter an API key to connect your MailChimp account and configure some default settings.
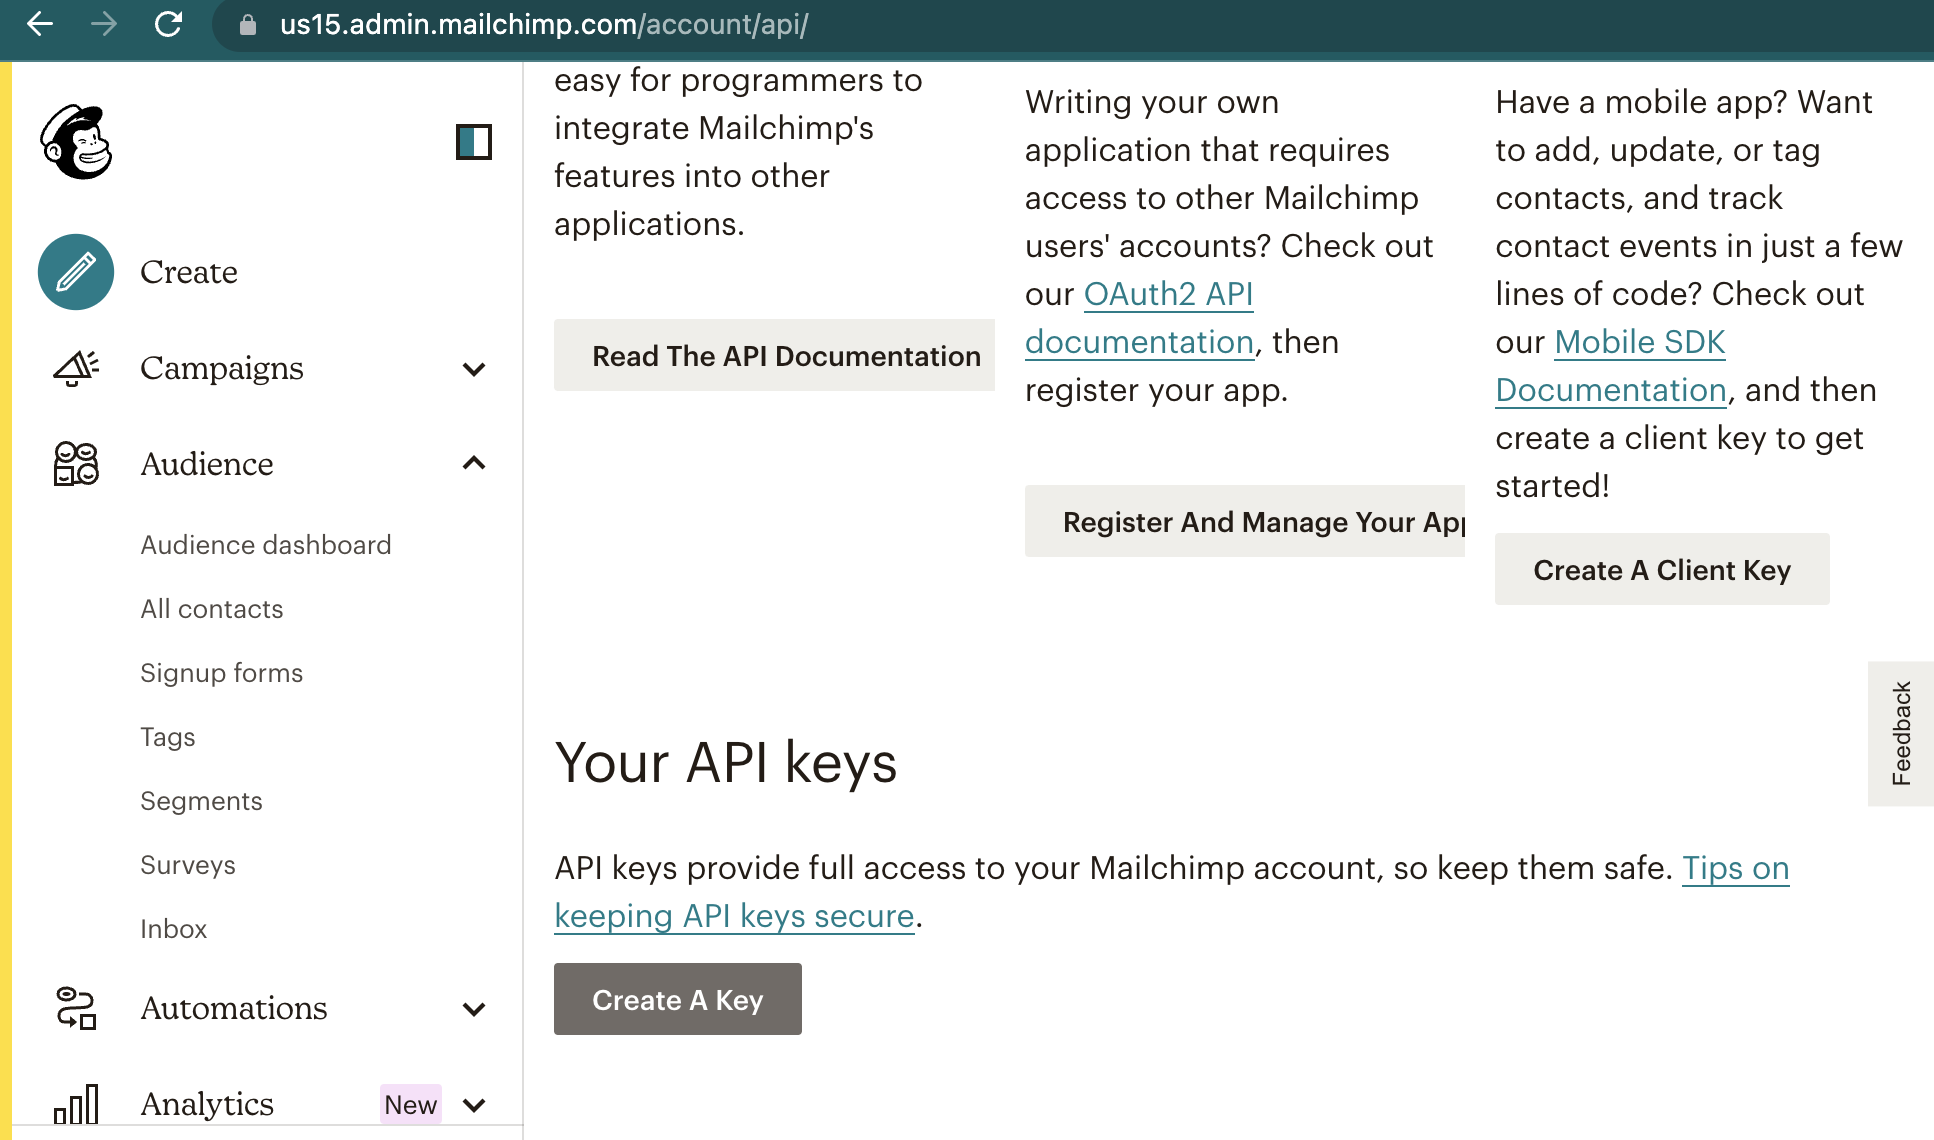
5) Get a MailChimp API key
Follow the provided link to log in to MailChimp on mailchimp.com and generate an API key to use in the plugin. After logging in, scroll down the page to find a button to Create a Key.
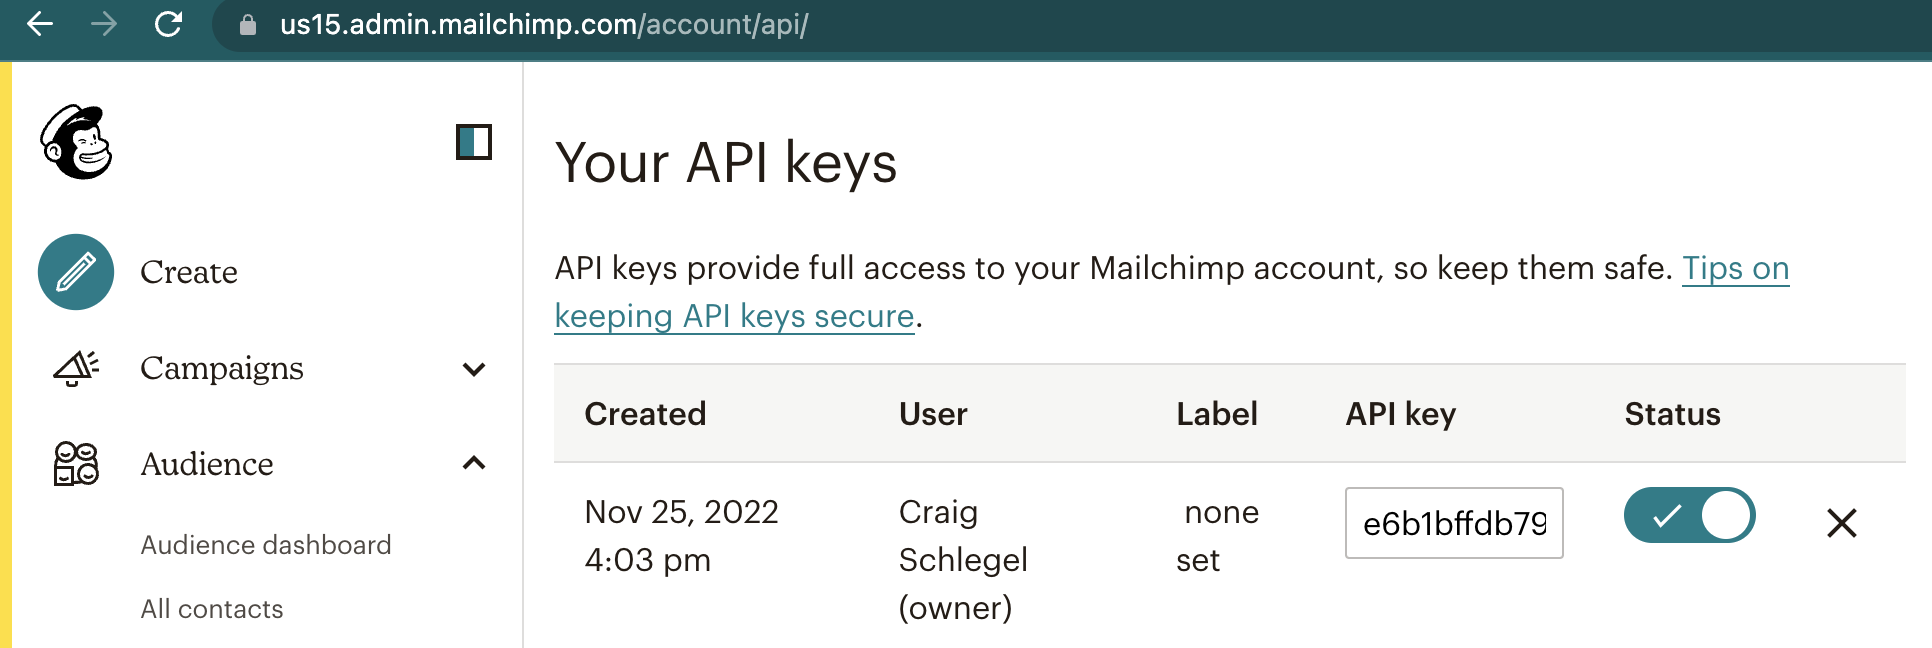
After creating an API key, copy the new key that should appear on the page.
Paste the new key on the settings page inside the plugin
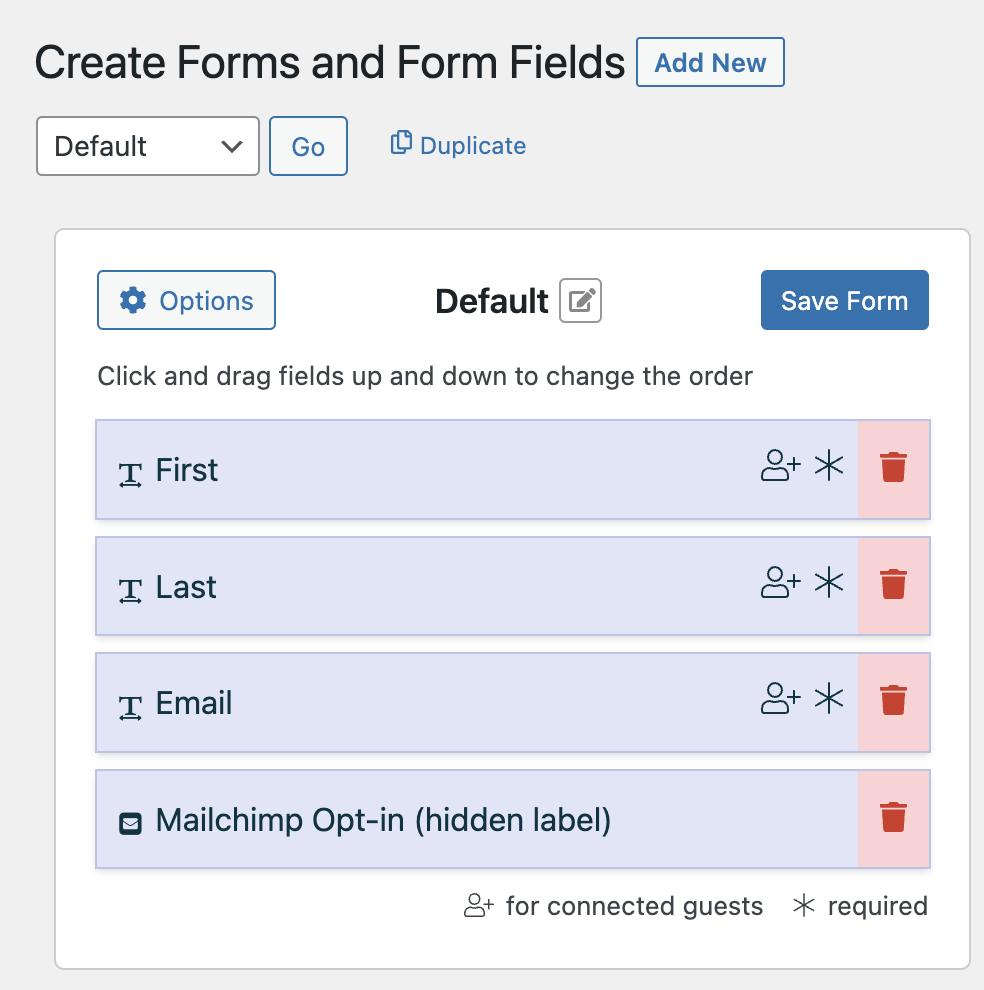
6) Add the new MailChimp Opt-in form field to your forms.
A new form field will appear among your available fields. Add this field to any form that you would like to use to collect email addresses from people registering.
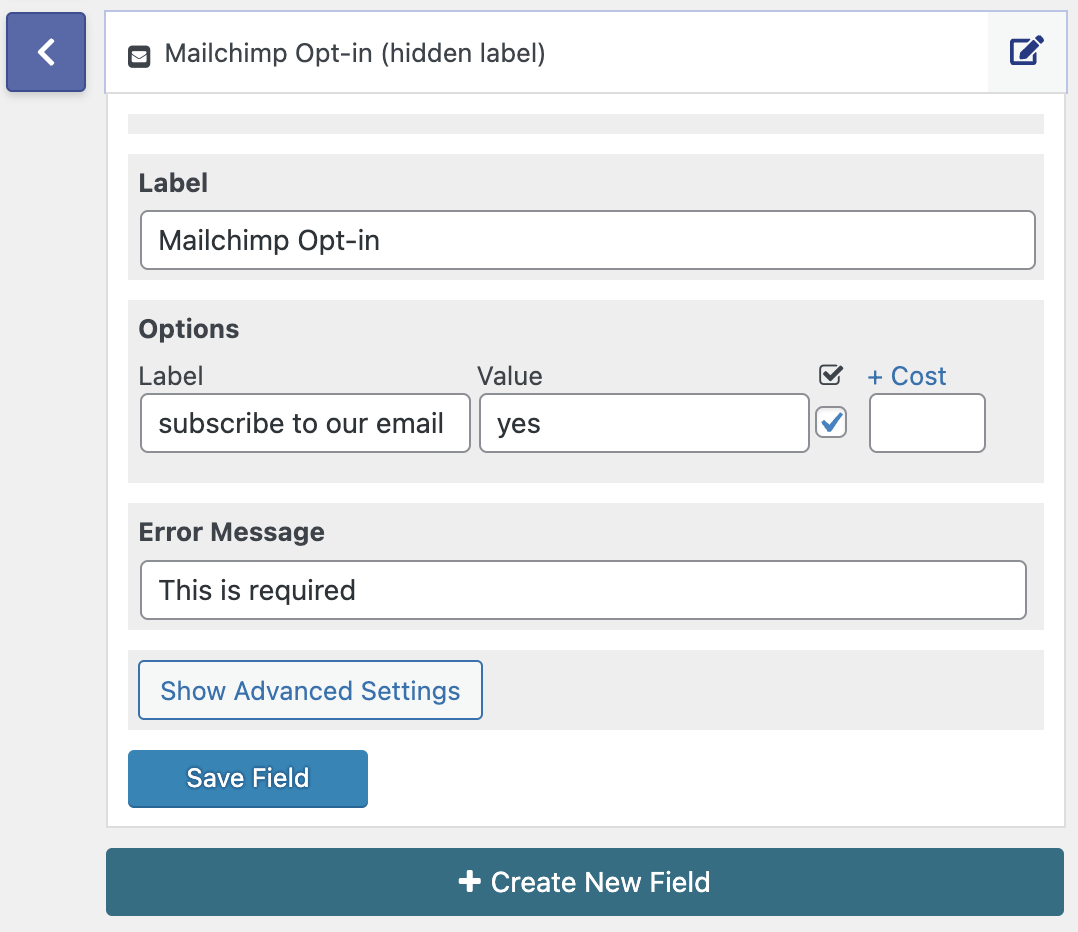
Add to the form and save your changes
All events that use the form with the MailChimp Opt-in field will be able to collect email addresses for your mailing lists when someone registers for the event.
Event Specific Settings and Configuring MailChimp Groups Options
Registrations for the Events Calendar Pro with the Mailchimp add-on allows your registrants to choose among group interest options in the form as well. This can be configured for each event individually.
When editing an event, find the Mailchimp options as shown below:

Here you can configure what, if any, tags will be automatically applied to people registering. You can also configure what, if any, group interest options will be included in the registration form.
Including the group interest options will allow registrants to select among the available options when completing a registration form. The person’s choices will update the subscriber for Mailchimp and not replace.

If you have more questions please visit our support page.