1) Install and activate The Events Calendar by Modern Tribe as well as Registrations for the Events Calendar Pro. Visit this page if you haven’t done this yet.
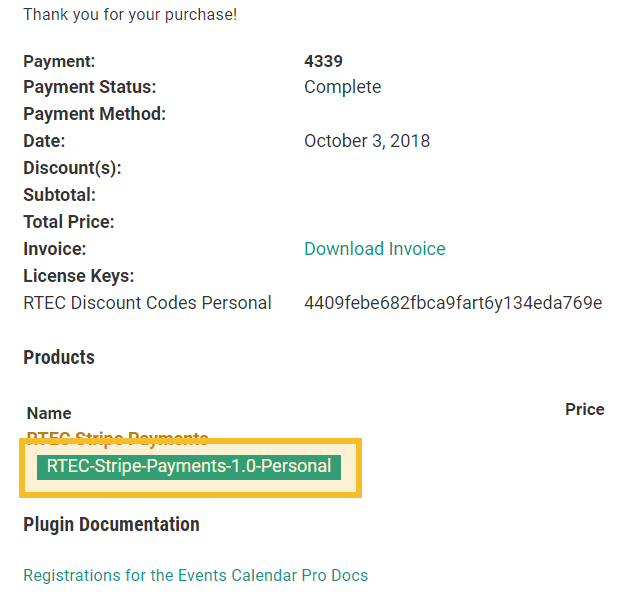
2) Once you’ve purchased the RTEC Stripe Payments plugin you’ll be presented with the purchase confirmation screen which displays your license key and a link to download the plugin. This information is also emailed to you at the address which you provided during checkout. Take note of your license key and click on the download link to download a zip file of the plugin.
Note: You can also download the plugin zip file directly from your Account on our website.
3) Once you’ve downloaded the zip file there’s no need to open it. You’ll be uploading and installing this zip file directly to WordPress.
Note: If you’re on a Mac then your OS may be set up to automatically unzip zip files when downloading. You can zip the files up again by just right clicking on the folder containing the files and clicking ‘Compress’. Alternatively, you can download the zip directly from your account.
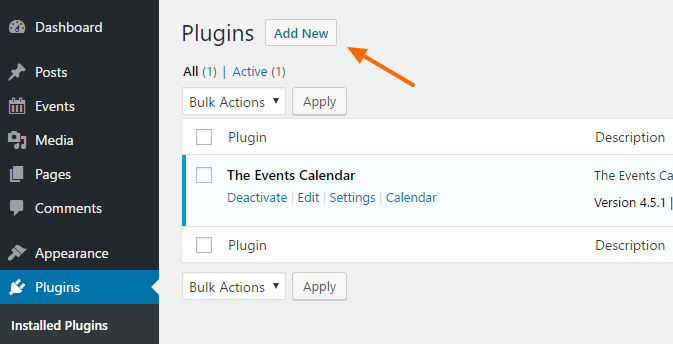
Click Add New at the top of your WordPress Plugins page.
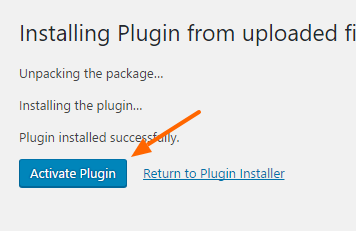
4) Click Upload Plugin at the top.
5) Browse to the zip file which you downloaded when you purchased the plugin and click Install Now.

6) Activate the plugin.
7) Under the Registrations menu, navigate to the License tab to enter your license key.
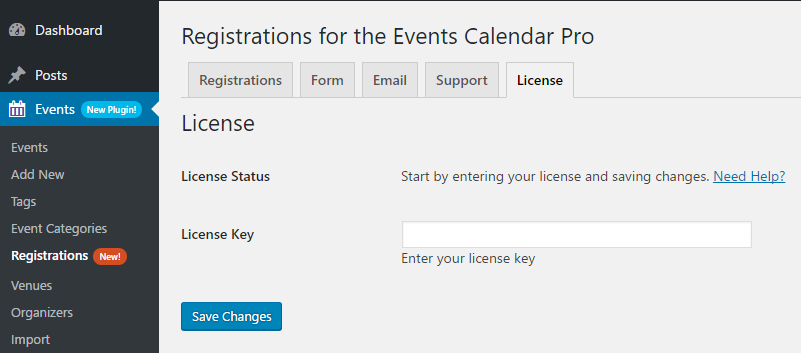
7) Paste your license key into the field and click Save Changes.
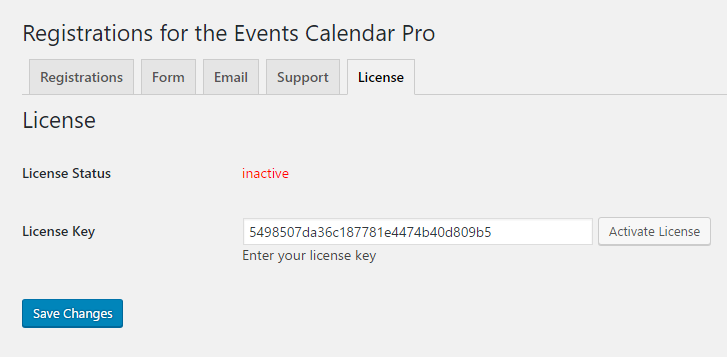
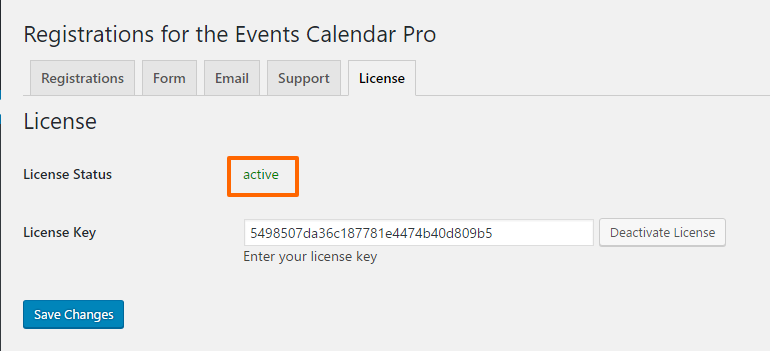
8) Click Activate License. If the activation was successful, your license status should be a green “active”.
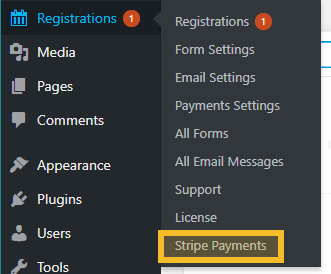
9) To configure your Stripe payment options and enter your API keys, click on Stripe Payments under the Registrations menu
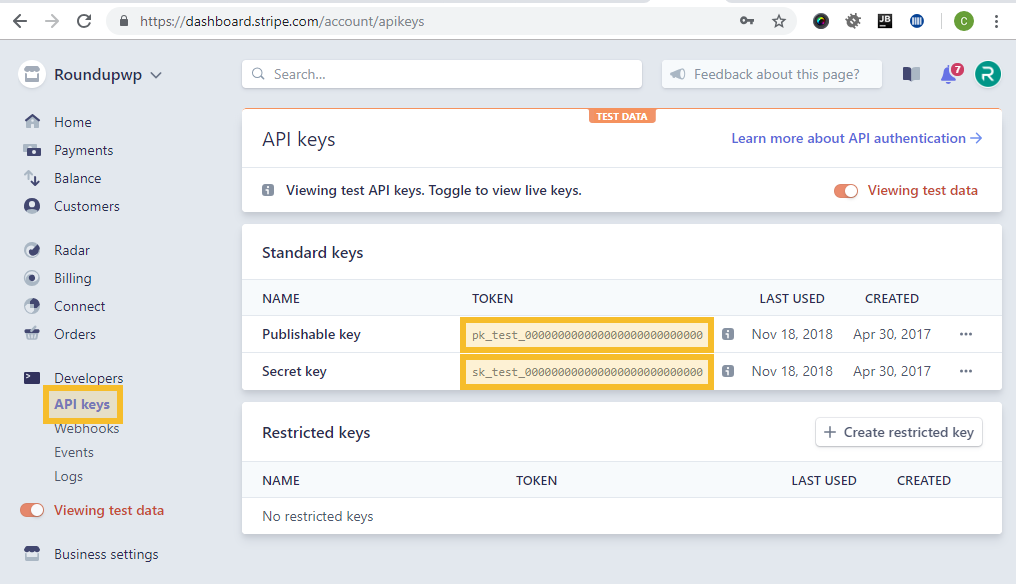
Collect your API keys by logging in to Stripe and visiting the API key page. You can collect both “live” and “test” API keys by using the toggle button found on the left sidebar.
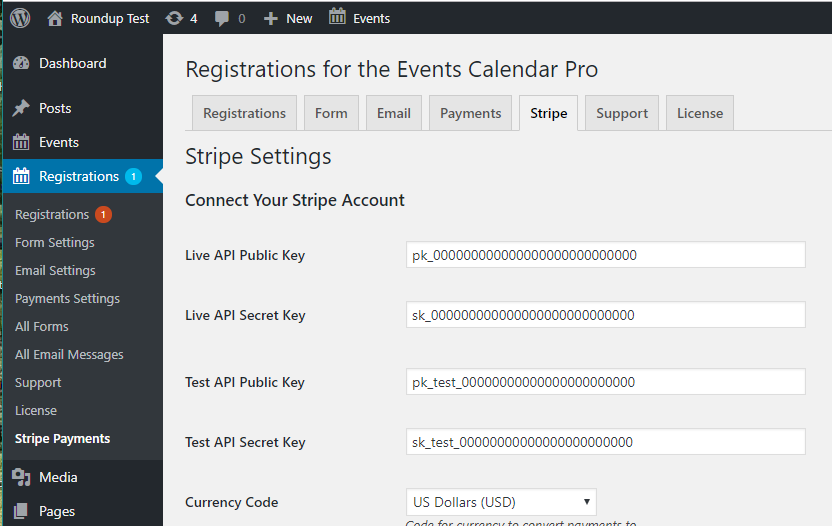
Once your API keys are entered and saved, the plugin will begin using Stripe to collect payments for events. Click on the Payments tab to enable test mode if you would like to test Stripe before going live.
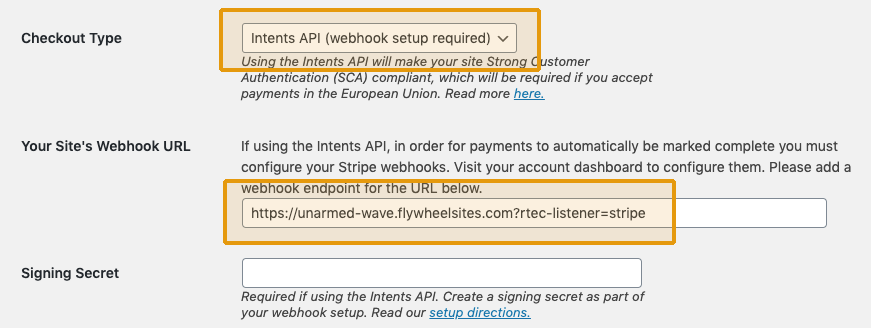
9) Choose Your Checkout Type (version 1.3 and newer)
The plugin offers two choices for how charges are made for your events.
Charges API
Charges are triggered by code on your site’s server. Payments are marked successful immediately. No further setup is needed.
Intents API (may be required if you accept payments from the European Union)
Intent to charge is triggered by code on your site’s server. Actual charge triggered by Stripe and then a notification is sent from Stripe to your site’s server to mark payments as complete.
Additional Setup for Intents API:
Note: Example uses the test API. Switch to the regular live API to collect actual payments
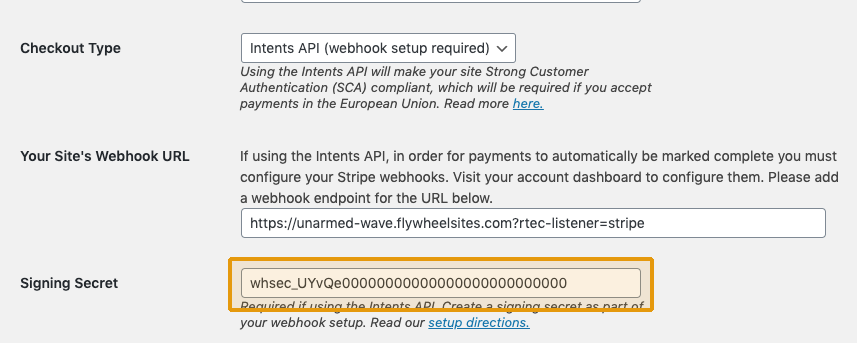
a) Copy “Your Site’s Webhook URL”
This is found on the “Stripe” tab for the Registrations for the Events Calendar settings page. You’ll also want to make sure you select “Intents API” as your checkout type.
Note: If you are migrating from the “Charges” API and are collecting live payments, do not change the checkout type setting until you have set up your webhook to prevent any interruptions
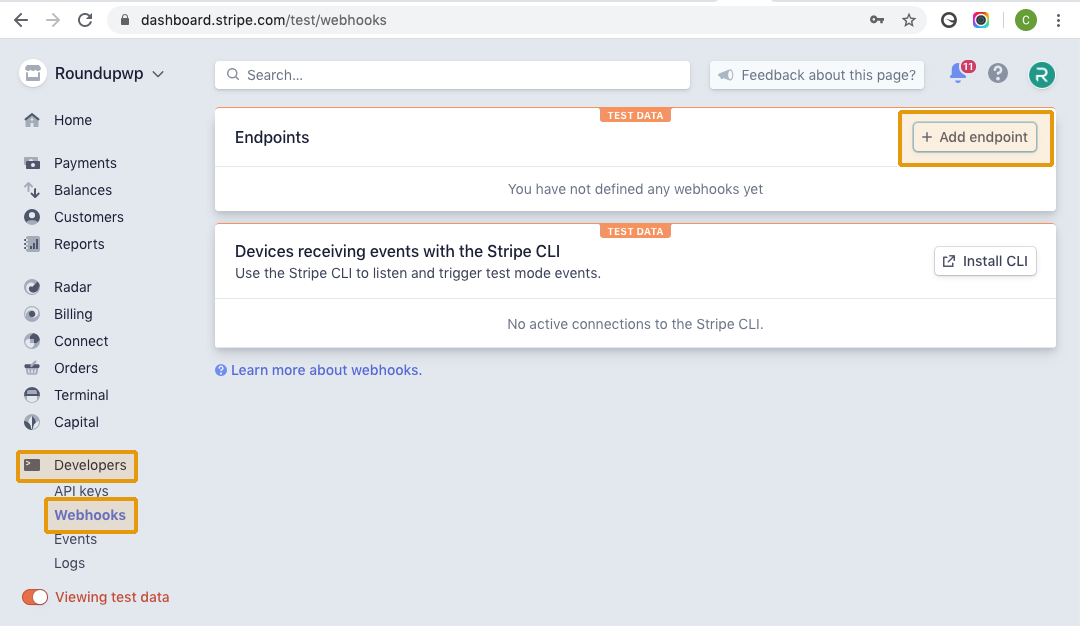
b) Create a New Webhook URL Record on Stripe.com
Log in to your Stripe account. From the dashboard, select “Developers”, then “Webhooks”, and then click the “Add Endpoint” button as highlighted below:
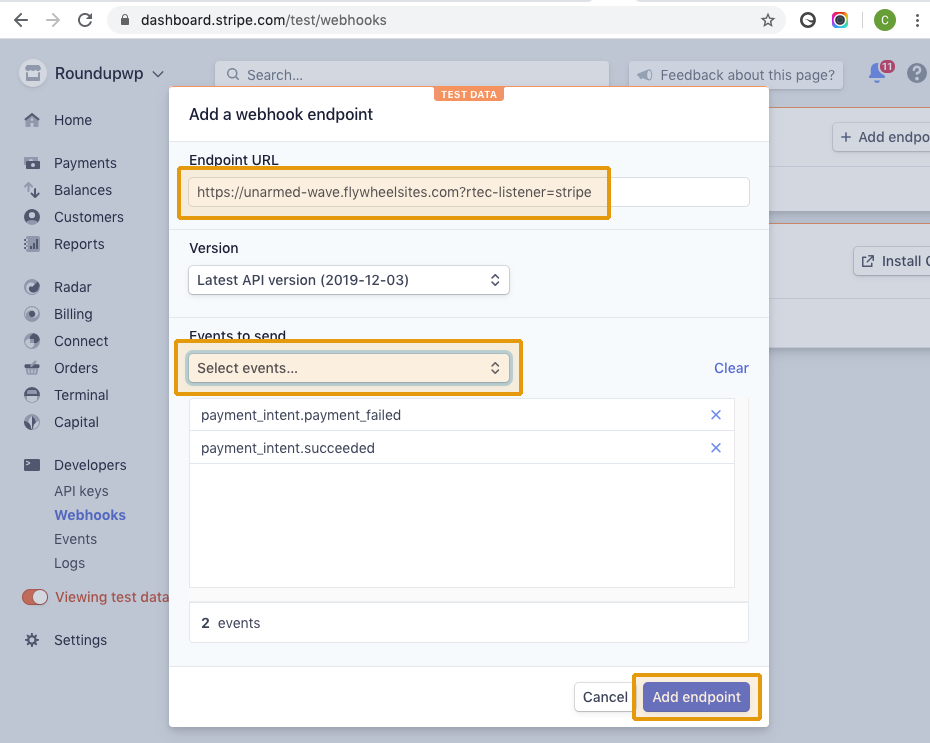
c) Paste Your Site’s Webhook URL and Select Events
After pasting your site’s unique webhook URL (copied in step “a”), configure your webhook to be used for two events “payment_intent.payment_failed” and “payment_intent.succeeded” using the dropdown menu. Click “Save”.
PLEASE NOTE: You will need to turn off test mode in Stripe.com and complete the webhook set up steps again so that it will be enabled for both test payments and your live payments. If payments are not being marked complete then this may be the cause.
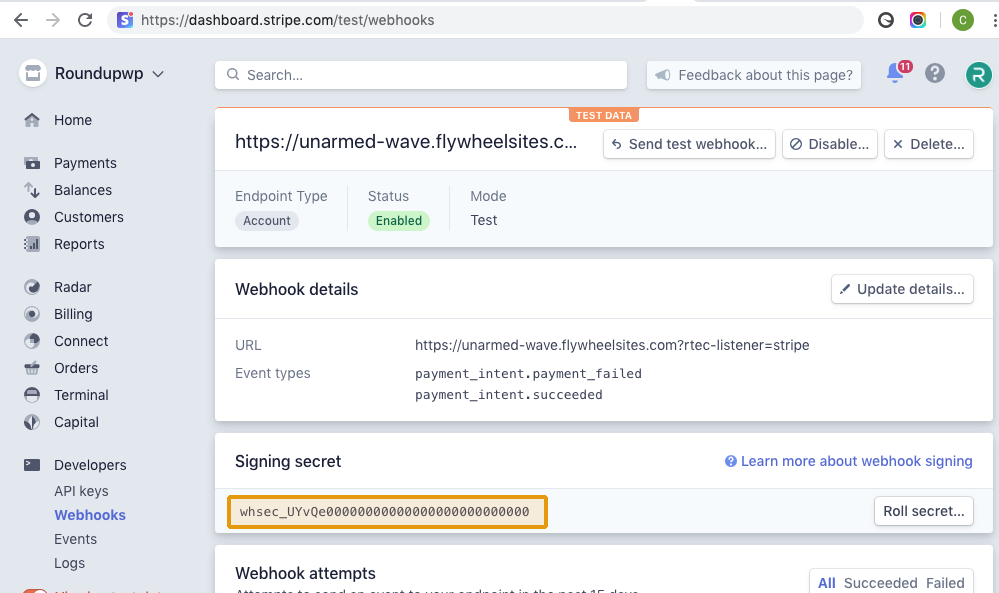
d) Copy Your Signing Secret
After saving your webhook, copy the signing secret found after revealing it by clicking the button to do so.
e) Save Your Signing Secret in WordPress
Go back to the Stripe settings page in WordPress and paste in the signing secret. Save your changes.