The multiple venues and tiers option can be used in several ways to divide your guests into sub groups that may apply to your event. Here are some use cases:
- Your event requires different costs from different kinds of attendees/selections like VIP vs general admission
- You have an event that has multiple venues/locations
- You have limited seating for two or more spaces for an event such as balcony seats vs floor seats
- Your event has statuses that your guests can select like racing, waiting to race, watching the race (this is what we will use in our example)
Basic Set Up
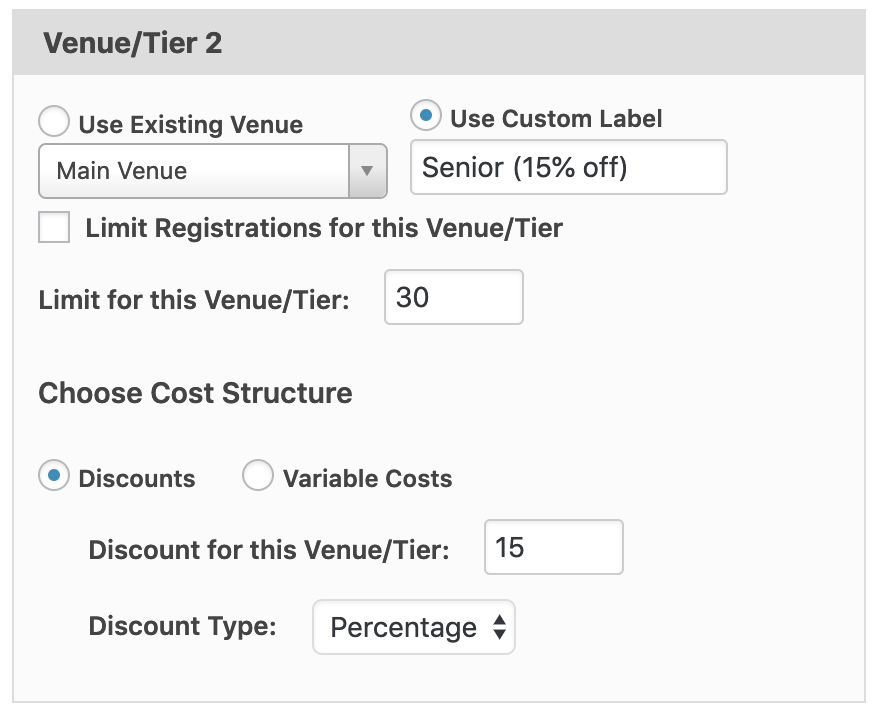
First, configure the default Multiple Venue/Tier groups on the “Form” tab. You can set capacity limits, timeline availability options, and other information as shown below:
Label and Descriptions

Restrictions

Costs

Your venues and tiers can be specially configured for each event on the “edit event” screen as well as on the “Registrations” tab “Event options” dropdown.
You can now manage registrations divided up by each of your venues/tiers in the backend as well as manage all registrations for an event and any registrations that have not been assigned to a specific group yet.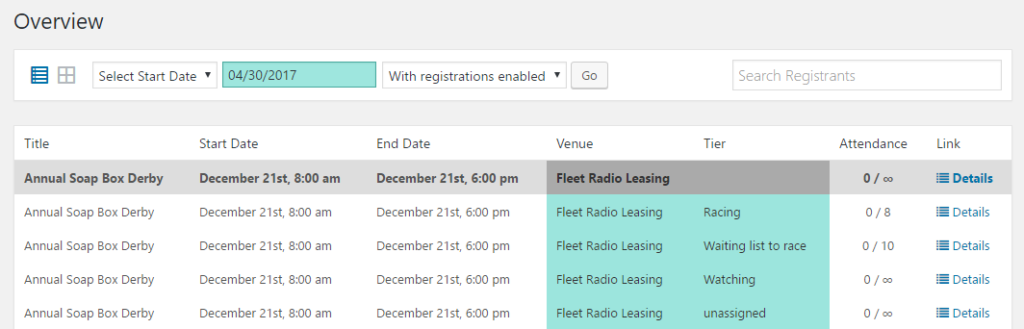
Setting Up Different Costs
You can either vary the cost by having the venue/tier selection discount the event price or by setting a completely different price. These settings are found by revealing the cost settings.
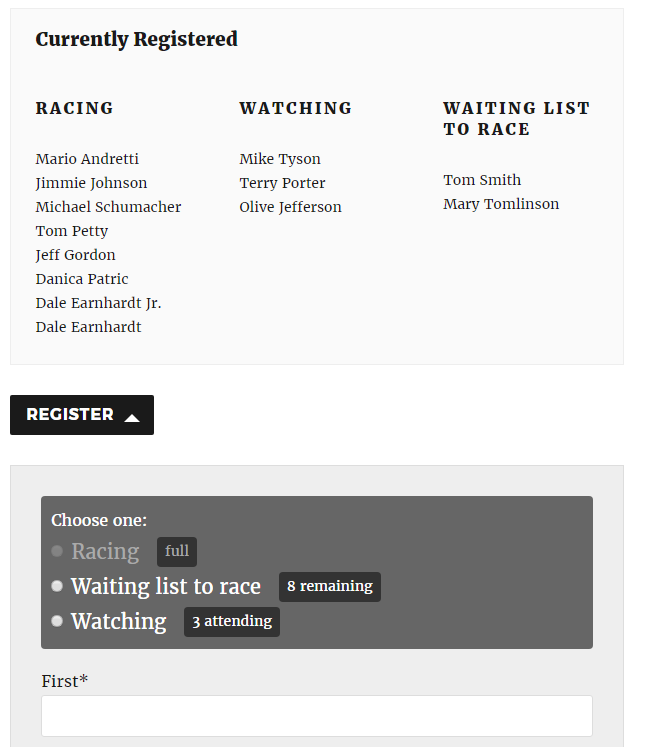
Front-end Display
Your visitors can now select from one of your tiers as long as the limit hasn’t been reached. Check the box to show your attendee list above the form to have your registrants along with their chosen tier displayed. Only confirmed guests will be shown here.
Note: Making changes to the Venues/Tiers after registrations have been made may require some manual reassignment. You can reset the attendance count by adding, editing, or deleting registrations manually for an event.