As of version 2.0 for the “Pro” version of Registrations for the Events Calendar, you can create multiple automatic messages for each of your events. Use this guide on how to create, delete, and see what messages have been sent and to whom.
Setting Up Automatic Messages
1) Select the “Events” menu item in the WordPress dashboard.
2) Find the event you want to schedule an automatic message for, select “Edit”.
3) Scroll down to the “Automatic Messages” area.

4) Click the button to add a new automatic message. You can then select the template you would like to use and an approximate send date based on the event start date.
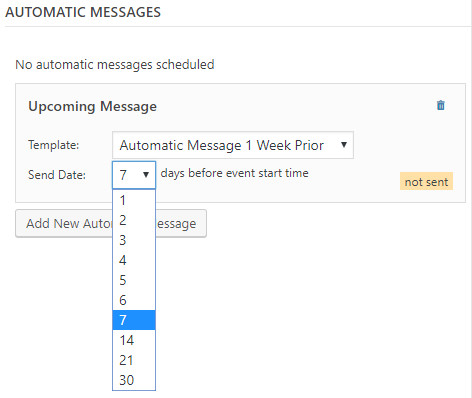
5) Click “Update” in the “Publish” meta box to save your changes and schedule this message.
Deleting or Stopping Automatic Messages
1) Select the “Events” menu item in the WordPress dashboard.
2) Find the event you want to schedule an automatic message for, select “Edit”.
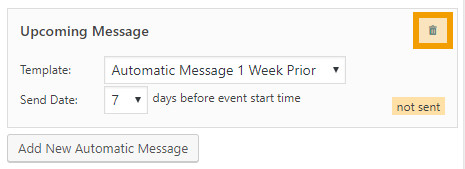
3) Scroll down to the “Automatic Messages” area.
4) Click the “trash” icon for the automatic message.
5) Click “Update” in the “Publish” meta box to save your changes and unschedule any automatic messages that have been removed.
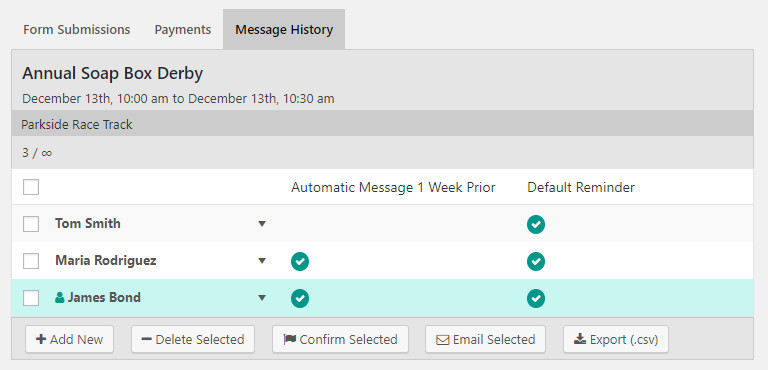
Tracking Message History
Every event now keeps track of automatic messages sent or custom email messages sent manually. You can see what attendees have had an email sent to them by going to the “Registrations” tab, “Detailed” view for an event and then use the “Message History” tab.