As of version 2.9, if your site uses WPML (WordPress Multilingual Plugin) you can translate your forms, messaging, and email templates by doing the following:
Translating Forms, Text, and Configuring Options
1) While on the Translations tab, change the Translation Source setting to Translations. This will ignore all custom messages in the other settings and instead translate all text in the plugin using translation files and your WPML settings.
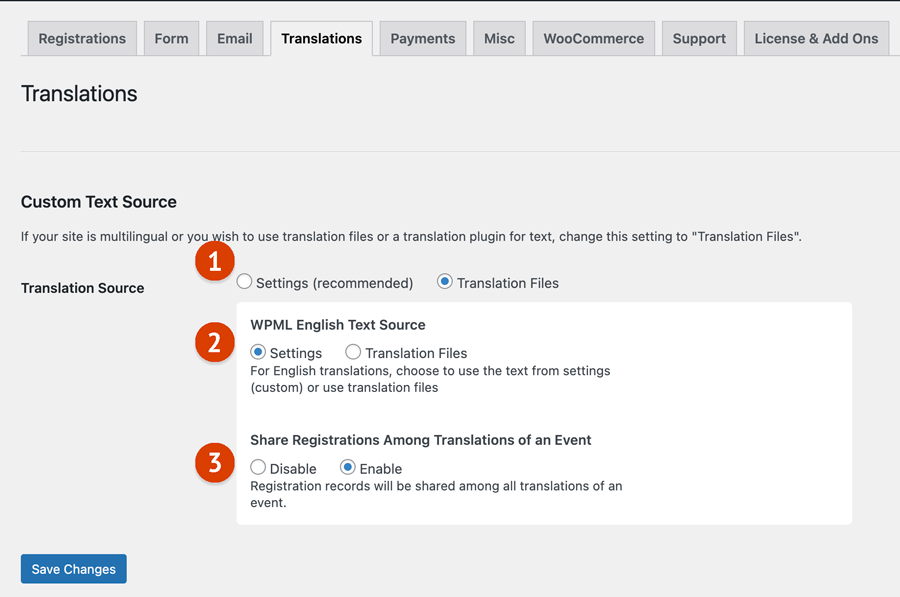
- Translation Source Setting
“Settings” will use all translations from your settings for all text. “Translation Files” will allow WPML and other translation plugins to alter the text. - WPML English Text Source
If you want to use your settings for English translations, enable this setting. - Share Registrations
By default, each translated event is treated separately for registration. Enabling this setting will cause all translated events to share registrations.
2) Create new forms and form fields using the All Forms page under the Registrations menu item. If a field you want to translate already exists, you’ll need to save the registration field in order to make it translatable.
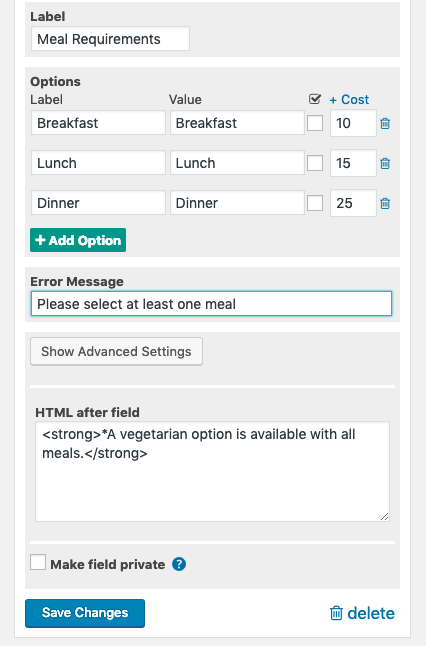
3) Navigate to WPML->String Translation. Search for the domain “admin_texts_rtec_form_translations” to find form field text that is now translatable.
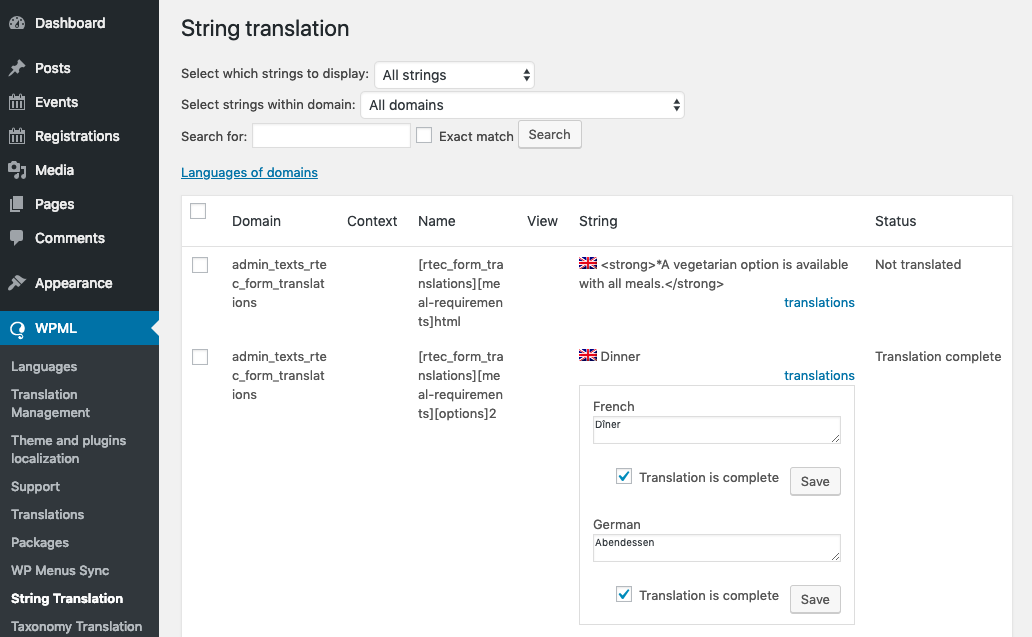
You can also search for “registrations-for-the-events-calendar” to translate other messages in the plugin.
Translating Email Messages
To translate email messages, first visit the “Email Messages” menu item in the WordPress dashboard side bar. This will show all available email message templates.
Add translations to your desired email message by clicking the “+” icon in the translations column.
A new modal will pop up allowing you to create a translated version of the content of the email message. Click the button in the bottom right once you have finished:
You now have an email template that also has translations available. Our plugin will detect this and apply the translated version of the email based on what version of the event is being registered for. Next we will create an event that has a translation.
Go the Events menu and add a new event (or edit an existing one). Add or edit the content as needed for the default language.
Make sure the email template you have just created and/or translated is selected for the confirmation email (or waiting list promotion email or manual payment instruction).
Save your settings.
Complete the translation using the pop up interface as you did with the email message.
The registrations plugin will now detect what version of the event the person is registering for and apply the correct translation. For example, if the person is registering for the German translation of this event, the confirmation email will be in German.
Have questions? Please contact support.